HP Laser Printers - How to Print Photos (Windows)
HP Laser Printers - How to Print Photos (Windows)
This document is for the HP Laser 100, 150, 1000, MFP 130, and 170
printer series.
Print photographs from a Windows PC using the correct paper type and print
job settings.
Step 1: Load photo paper into the main input tray
Load photo paper into the main paper tray.
NOTE:If your printer has a separate photo paper tray, consult your user guide on how to print from the tray.
-
Remove any plain paper from the main paper tray.
-
Load the short edge of the photo paper into the tray with the glossy or print side facing up. If the paper has a perforated tab, load the paper so the tab faces up or towards you to prevent printing on it.
NOTE:
Do not use inkjet photo paper. It could cause damage to the machine. -
Adjust the paper width guides so they rest against the edges of the paper.
Step 2: Print the photo
Open the print window and document properties to set up the print job.
-
Before printing, edit the photo to improve colors, brightness, contrast and any other appearance settings.
-
Right-click the photo, select Open with, and then select Windows Photo Viewer or Paint.
NOTE:
For Windows 10, open the photo with Paint to use these steps. Windows Photo Viewer does not come with Windows 10 and was replaced by the Photos app. -
Click Print, File, or the menu icon (Paint), and then click Print.The Print or Print Pictures window opens with general print job settings.
-
Open the printer Document Properties window to access more print settings.
-
In the Print Pictures window in Windows Photo Viewer, click Options, and then click Printer Properties....
-
In the Print window in Paint, click Preferences.
-
-
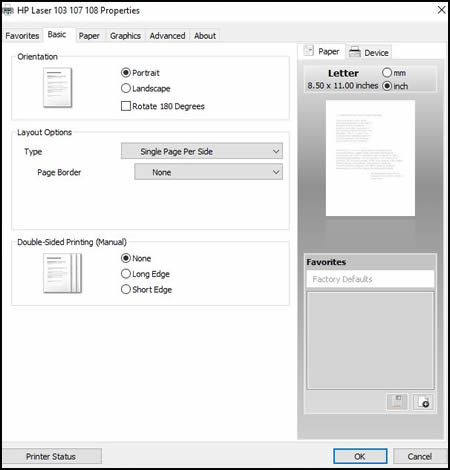
Find and use print job settings for photos in the Properties window.SettingLocationPortrait or landscape orientationSelect Portrait for vertical prints or Landscape for horizontal prints.Orientation menu on the Basic tabPhoto paper typeSet the paper type you are using, such as HP photo paper, glossy, or matte finish.Paper Options menu on the Paper tabPaper sizePaper size: Select the Original Size for your print job, and then select the Output Size for the paper size you loaded in the printer, such as Letter or Legal. Check your printer specifications for supported paper sizes.Paper Options menu on the Paper tabSome newer printers support more paper options. Go to Creating Custom Paper Sizes for more information.Add or remove a borderAdd a white border around the photo or print to the very edge of the paper.Layout Options menu on the Basic tabThe Favorites tab might include shortcuts to print with or without a border
-
Change the following color and quality settings for best photo printing results.SettingLocationQuality: Measured in print resolution dots per inch (DPI). Higher DPI produces clearer and more detailed prints, but slows print speed and may use more ink.
-
Normal: Default quality setting suitable for most print jobs
-
Best: Better DPI than Normal
Advanced on the Document Type menu on the Graphics tabEconomode: Lowest DPI typically used when ink cartridge levels are low or when high quality prints are not neededEconomode menu on the Graphics tabPrinting in color or grayscale: The following settings might be available, depending on the printer model:-
Color: Uses all cartridges to print documents with color text or images
-
Grayscale: Printer uses ink from all cartridges to produce a wider range of black and grey tones; suitable for high quality black and white prints
Select Color or Grayscale on the Graphics tab -
-
Click OK, and then click Print.
-
After printing, remove any photo paper from the tray and store it in the package it came in or in a plastic bag. If left in the tray for an extended time, the paper might start to curl.
Tips for printing quality photos
Read these tips and recommendations for printing the best pictures with
your HP printer.
-
Use HP photo paper: HP photo papers are optimized for use with inkjet printers and provide quality prints for craft projects or framing.
-
Take high resolution photos: Higher resolution photographs result in clearer, more vibrant prints.
-
Edit photos before printing: Before printing, use photo editing tools to improve colors, brightness, contrast, and any other appearance settings.
-
Check the computer display: If your computer monitor displays colors inaccurately, printed photo quality might be unsatisfactory. Try changing to the monitor's default color settings or use a calibration tool to confirm the color accuracy.
-
Use Photo or Best quality in print settings: Higher print quality settings provide best results.
Frequently asked questions
Read frequently asked questions about printing photographs.
How do I get the HP Laser driver?
If you cannot find all available print settings, you might not have
the full feature HP driver installed. Download the latest driver from
123.hp.com.
-
Turn on the printer.
-
If your printer is connected to the computer with a USB cable, disconnect the cable from the printer. The software installation prompts you to connect the cable if needed.
-
Download the latest version of the printing software from 123.hp.com, and then follow the on-screen instructions to install the software.
How do I create a print settings shortcut (favorite)?
Create a new favorite (print settings shortcut) in Properties.
-
In the app you created the document in, click File or the menu icon
 (WordPad), and then click Print to open
general print settings.
(WordPad), and then click Print to open
general print settings.
-
Click Printer Properties, Properties, or Preferences.
-
Change any of the settings.The settings you select display in the Favorites window on the lower-right of the Basic, Paper, Graphics, or Advanced tab.

-
In the Favorites section, click the Add icon
 .
.
-
Type a name and description, select an icon, and then click OK to save the new favorite.The favorite is added to the Favorites tab.
How do I set default settings for all print jobs
Set the default settings for all print jobs in Windows.
-
Search Windows for control panel, click Control Panel in the search results, and then click Devices and Printers.
-
Right-click the icon for your printer, and then click Printer Properties.
-
Click the Advanced tab, and then click Printing Defaults.
-
Change any settings you want as defaults, and then click OK.
How do I create a mirror or reverse version of a photo?
The Paint app has settings for flipping a photo over for print jobs
such as iron-on transfers.
-
Right-click the photo you are printing, and then select Paint from the Open with menu.
-
On the Home menu, click Rotate, and then click Flip horizontal.

How do I print photos from my phone or tablet?
Go to one of the following documents for steps and requirements to
print pictures from a mobile device to a printer that is on the same
wireless network.
https://support.hp.com/


Comments
Post a Comment